
Last updated on March 22nd, 2023 at 10:19 pm
The vehicle ignition switch is a significant component with a simple mechanism that functions as it draws electrical energy from the battery. This power runs all electrical systems as it comes through the wires fixed to the bottom side of the ignition switch.
However, most vehicle ignition systems have 4-wire terminals. Perchance, these terminals have different positions in various vehicles, including the battery, the starter, the ignition input, and the accessory.

Wiring or replacing the ignition switch is vital when turning on your vehicle’s electrical systems becomes defective. Although, you would need to determine when the ignition system or starter motor will fail. So, getting the correct information on how the ignition switch functions will be wise. Also, Read this: What Are The Ignition Switch Wiring Color Codes?
This write-up will help bring answers to these typical queries ranging from; how does a 4-wire ignition switch work, what wires go to ignition switch, how to wire an ignition switch, how does a 4-wire ignition switch work, how to wire a universal ignition switch diagram, how does a 5-wire ignition switch work, and more.
Read on, as an in-depth study of this guide would significantly improve you!
How Does A 4 Wire Ignition Switch Work?
A 4-wire ignition switch is an electrical circuit working effectively to start a vehicle. When you turn your vehicle’s key to the ON position, electric power flows from the battery through the ignition wire (IGN) and to the other 3 wires. Although, the 4 wire switches are on the vehicle’s dashboard of most models.
What Wires Go To Ignition Switch?
The wires that run through the ignition switch are; the BATT for the battery, ST for the starter, ACC for the accessory, and IGN for ignition. However, your vehicle may differ due to the model. So, ensure to consult your manufacturer’s guide.
How To Wire An Ignition Switch?
To wire an ignition switch depends on the vehicle model, but the simple procedures below should be beneficial for a push-button starter switch.
Here you have them;
- Park your vehicle on level ground as you turn off the engine.
- Discover and locate the wires on the back of the ignition switch. There you would find 4 terminals designated STfor Start, IGN for ignition, ACC for accessory, and BATT for a battery. It would be safe to confirm the information with your owner’s guide.
- Using a wrench, disconnect the battery’s negative and positive terminals. However, ensure that the negative terminal doesn’t have contact with any other terminals.
- Pull off the steering wheel trims. Remove bolts or screws as you take off the plastic clips and place them securely.
- Do well to disassemble the steering wheel to access the steering column. You could get an ignition switch wiring diagram to make your work easy and faster.
- Have reasonable access to the ignition switch. Take off the ignition module cover as you use a screwdriver to push down the release mechanism on the hooks.
- Put your keys in the ignition as you turn them in the Accessory position. Doing this would enable you to get to the release of the ignition module. However, if you don’t have your key, you could carefully use a flathead screwdriver to press down the release pin inside the hole of the ignition module.
- Release the pin that secures the ignition switch as you pull it out of position. If done correctly, it will pull out effortlessly. If it is problematic, gently repeat it to release the pin.
- Use a test light to inspect for any defection. You might need a new one, or you could rebuild it.
- Gently check for wires as you would ascertain the power terminal from the battery to your vehicle’s ignition switch. It is commonly red. Fix the terminal end of the power wire and secure it using a multi-tool. Hence, fix the power wire to the BATT terminal of the ignition switch.
- Connect the accessory cable to the ACC terminal of the switch. Similarly, the accessory wire would be functional when your vehicle is in the ACC position.
- Fix the starter wire to the ST terminal.
- Install the ignition cable to the IGN terminal.
- Reinstall the rewired switch after all the wiring processions as you put back the ignition switch in by releasing the pin as you would apply some pressure.
- Test run the newly wired ignition switch as you reconnect the battery terminals. It should be in excellent condition; if not, repeat the procedures carefully.
- Reassemble the vehicle’s components correctly as you shut down the engine.
By following the above procedures accurately, you will have successful wiring without any or little stress.
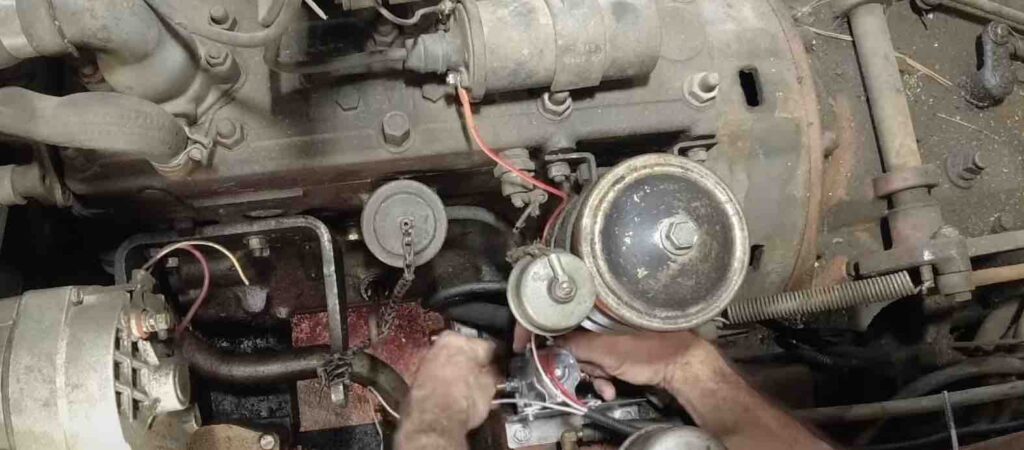
How To Wire An Ignition Switch On A Tractor?
According to research, replacing your tractor’s broken or faulty ignition switch is better than rewiring. Although, you would require the procedures for replacement.
Tools needed for successful wiring.
- Flathead screwdriver
- Pliers
- New ignition switch
Check out the steps below;
- Set your tractor on the parking brake to the OFF position.
- Have access to the hood of your tractor to open the back of the ignition switch.
- Access the wiring harness and unplug it by hand or use the plier to disconnect the wiring harness.
- Pull off the retaining ring from the front of the ignition switch as you twist it off with the plier. The ignition would get loose to an extent but not too open for the operation panel.
- Use the flathead screwdriver to push the retaining tabs on either side of the ignition switch. Also, press the ignition switch out through the front of the operation panel.
- Insert the replacement switch through the front of the operation panel as the retaining tabs appear. Fix the retaining ring on the front of the switch as you tighten it using a plier.
- Connect the wiring harness back to the replacement switch’s back side. Then, close the hood on your tractor as you insert your key and turn the ignition to the ON position.
How To Wire A Universal Ignition Switch Diagram?
To wire a universal ignition switch, you must be familiar with all the terminals and wires at the back of the switch, such as the; BATT for battery, ST for starter, ACC for accessories, and IGN for ignition are vital to successful wiring.
Below are steps to wire a universal ignition switch
- Detach the negative battery wire and ensure the vehicle is in parked gear.
- Put the key into the ignition and ensure it is OFF.
- Pull off the key and have access to the ignition switch close to the steering column.
- Attach the battery wire to the BATT terminal at the bottom of the ignition.
- Attach the accessory cable to the ACC terminal at the upper side of the ignition.
- Attach the ignition cable to the IGN terminal almost opposite the side of the ACC terminal.
- Attach the starter cable to the ST terminal at the center of the switch.
- Reconnect the battery wires and check for any wrong wiring.
- Have a test run of the ignition switch as you start the engine.
The above steps should be helpful!
How Does A 5 Wire Ignition Switch Work?
The 5-wire ignition switch works with the combination of these terminals; BATT or 30 is the pole for the battery wire, 87 or ST is the pole for the starter wire, IGN or 87a is the pole for the wire to the ignition module control, ACC poles, X for 85, and 86 for SU are accessories wires that can function in the 5-wire ignition switch without the ignition in ON position and the engine ON as per se.
So, the 5-wire ignition switch has an additional accessory wire, unlike the typical 4-wire ignition switch.
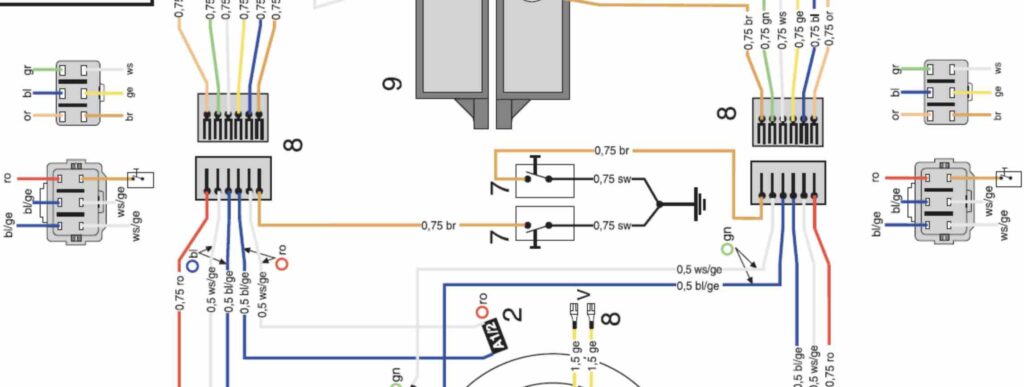
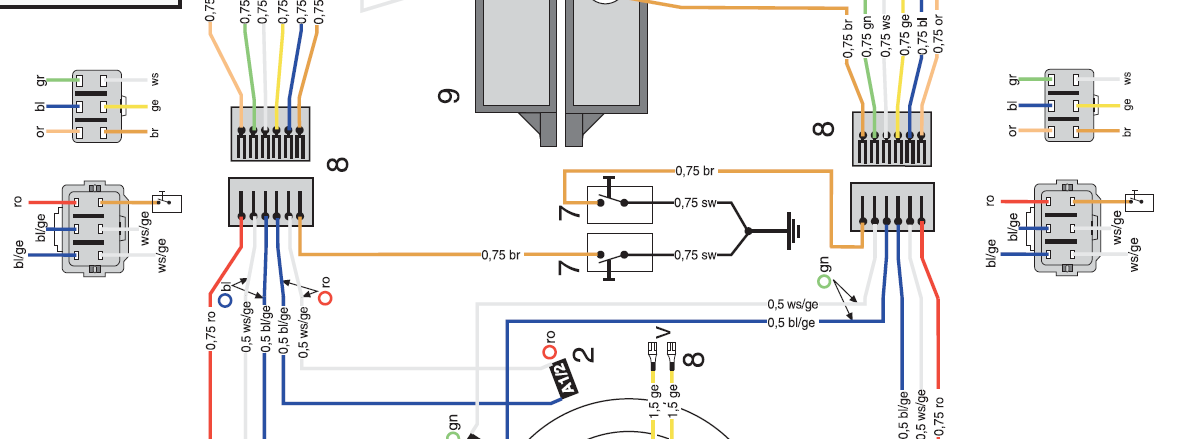
Sample Of, 5 Pole Ignition Switch Wiring Diagram
Check out the sample of a 5-pole ignition switch wiring diagram below;
6 Wire Ignition Switch Diagram
The 6-wire ignition switch consists of the RUN, OFF, and START positions. If your ignition switch is in the position of OFF, it will shut down your engine, and the magneto will be down. In a 6-wire, the RUN position would connect all accessories to your battery.
When you put your vehicle’s ignition in the position ON, a connection would initiate between the battery and the solenoid. The starter motor connects to the solenoid, enabling the car to switch ON the engine.
A 6-wire ignition switch requires a battery and a power source to run the accessories and start the engine. Essentially, the starter motor is a vital component of a 6-wire ignition switch, whose primary work is to turn the engine’s flywheel. It also ensures enough air-fuel mixture to ignite a spark in the combustion chamber for the engine to start. On the other hand, the magneto helps to stop or shut down your vehicle’s engine at the proper time, while the ground guarantees the correct running of different parts.
How Does A 6 Wire Ignition Switch Work?
You can use the 6-wire in gas generators, vehicles, boats, motorbikes, and tractor-trailers. This 6-wire ignition switch should have OFF, START, and RUN positions. If you eventually put the ignition switch in OFF, the engine and the magneto would shut down. When the engine is in RUN, accessories are attached to the battery. As the ignition is in position ON, the solenoid and the battery would connect, and enable the starter put the engine on as it connects with the solenoid. However, the starter is essential to working the 6-wire switch.
How Does A 4 Wire Ignition Switch Work?
The working mechanism of a 4-wire ignition switch is significant for an automobile that uses a 4-wire to send electric power to the battery and the engine. It happens as your insert your key in the ignition and put it in an ON position; power leaves the battery to the ignition wire and others wires involved in the system.
4 Pole Ignition Switch Wiring Diagram
Let’s have an overview of the 4-pole ignition switch wiring below;
The 4-Wire Ignition Switch
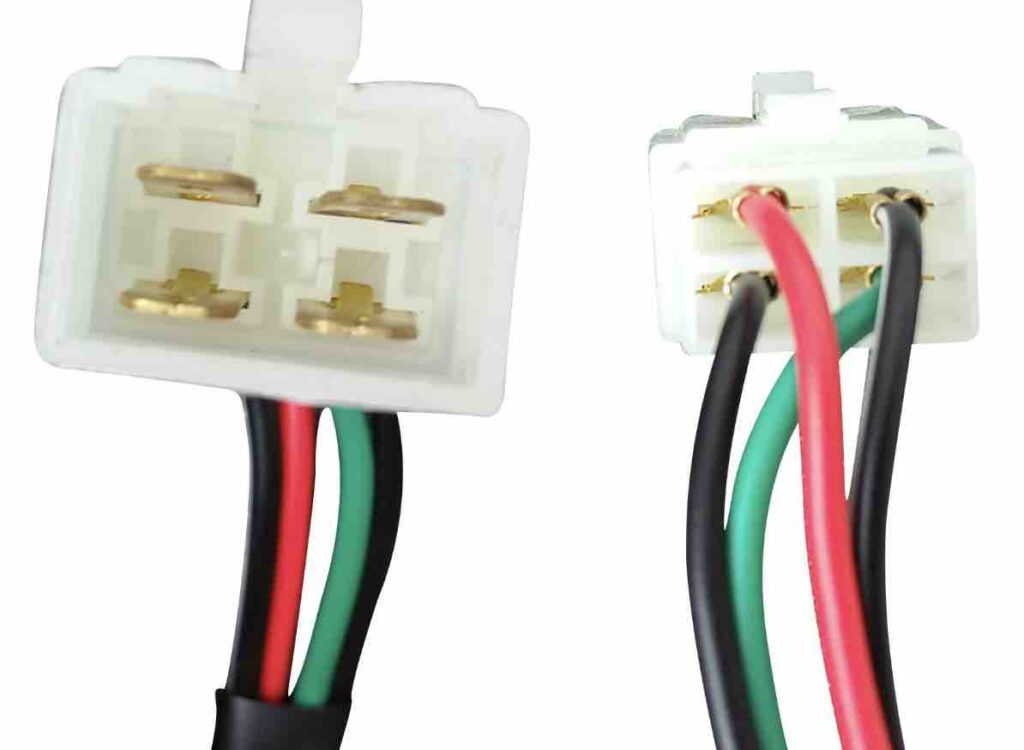
In a 4-pole ignition switch wiring, four wires run from the ignition switch to your engine. These wires’ colors include; white, green, red, and black. The white wire is always hot as it goes to the distributor, and the black wire is the ground as it connects to the battery. Similarly, the red cable turns the lights as it controls the light switch in your vehicle, and finally, the green line is responsible for starting your car as it is attached to the starter motor.
Check out the wire indications below;
White–neutral wire
Black – hot wire
Green – ground wire
Red – accessory wire
Installing A 4-Wire Ignition Switch In Your Car
Follow these simple steps to get your work done as quickly as;
- Detach the negative battery wire.
- Pull off the ignition switch housing as you remove the screws and bolts that hold the cover.
- Remove the connector from the ECM as you pull off the module.
- Remove the holdings of the switch from its position.
- Install the new switch and bolt it in as you attach the module.
- Reassemble all coverings and reconnect the negative terminal of the battery.
- Test run your ignition switch as you start your vehicle.
Perchance, these steps should be helpful!
Conclusion
To summarize this guide, the ignition switch of any vehicle is a crucial component of the electrical system. Although it doesn’t last forever, it isn’t enjoyable to experience if it fails due to overuse.
On the other hand, knowing the kind of wiring system your ignition switch has is vital as you get familiar with the terminals in case of rewiring or installing a new one if yours fails.
So far, I have provided straightforward procedures to enable you to wire and install your ignition switch if necessary. Do well to share this informative write-up with others!

Uchenna is a Radiographer and Auto parts mechanic who recently got his automotive diploma as an auto repair technician, and since then, has worked on fixing various car problems.
Working as just a radiographer, Uchenna didn’t just get all the fulfillment he desired, because he truly loved doing things tilted toward cars. As a kid, he would take apart his toy cars to see how they worked and would spend hours tinkering with his bike.
So, in 2017 he made the tough decision to become an auto mechanic. He threw himself into his studies and now loves every aspect of what he does.
He gets to work with his hands, solving problems and bringing cars back to life, and sharing his knowledge and easy quick-fix guide online are all part of what makes him feel fulfilled.
